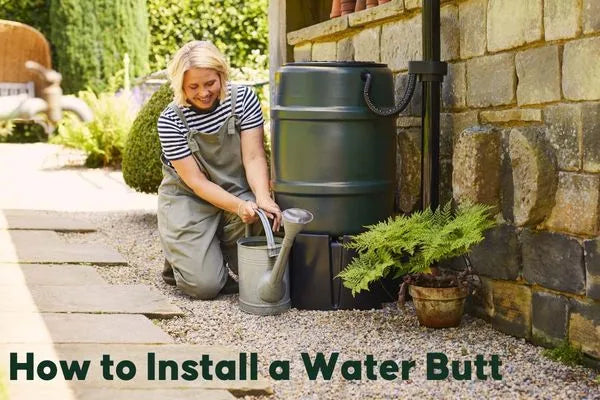
How to install a water butt?
Choosing a water butt
After witnessing the droughts of 2022, it’s become increasingly alarming to discover just how important conserving our natural resources is in helping to build a more sustainable future. The dry weather we experienced last year culminated in a severe summer heatwave, with record-breaking temperatures reaching 40.3°C in Lincolnshire, not to mention how parched our gardens and local reservoirs, lakes, and ponds were as a result. The UK is still recovering from the onset of this drought, with 63% of rivers (as of March 2023) currently recording low water levels in relation to this time of year.
It's clear how the problem lies in the changing climate producing unprecedented weather conditions for us to prepare for. Our solution? The water butt.
Our water butts are affordable, efficient, and sustainably made water saving solutions to last you through years and years of dry weather conditions, slashing your water bills in the process to save you some pennies too.
When choosing the right water butt for you and your garden, there’s a whole host of sizes, materials, styles, and capacities for you to consider. However, we’ll keep this article short and sweet with our best recommendations below, and let you have a browse of our water saving range.
Slimline Water Butts
Perfect for houses where space is a bit more of a premium, our slimline water butts are available in various kits, which can include a built-in tap, a 3-part stand, and a rain diverter kit. They’re quick and easy to install, and come in 100 and 110 litre sizes for single kits, or 200 litre sized double kits. Choose from the various colours of the sleek and simple Mini Rainsavers, or opt for the slightly more premium style of the Polybutts.
Recycled Plastic Water Butts
Made from up to 99% post-consumer recycled plastic, these water butts have been made in our Yorkshire-based factory, and include a number of our flagship brands, including Cloudburst, Harcostar, and Mini Rainsaver. The kits include everything you need to easily install and use your water butts straight away, featuring taps, spring operated lids, 3-part stands, linking kits (if it’s a double or triple kit), rain traps and rain diverter kits.
Decorative Water Butts
Not all water butts need to be shunned away in the corner of your garden. Make your water butt a display piece and browse our more decorative selection here. In various shapes, sizes, and colours, keep your garden looking beautiful.
Large Water Butts and Barrels
For families looking to save those extra valuable litres of water for their garden, our larger water butts and water barrels come in sizes from 200, to 227, to 350 litres, in various shapes and colours too.
Preparing for installation
A few safety measures when installing and using your water butts are described below:
- We recommend fitting your water butt with a lockable tap to prevent any accidents if young children, toddlers, or pets happen to venture near your water butt.
- Ensure you keep the lid fitted on your water butt for safety reasons, keeping insects and pests out too.
- Make sure the water butt is safely and securely attached. When empty, they can be light enough to be easily toppled over.
Installing a water butt
Fortunately, our water butt kits come complete with most of the requirements for a quick and easy installation.
Firstly, you’ll want to pick an area on flat, level ground, close to a downpipe, and position your water butt next to it. Now, measure the height of your water butt on the downpipe, and make a cut three or four centimeters (cm) below this marked height, using a hacksaw.
From here, you can attach the rainwater diverter onto the bottom of the downpipe, at the cut section. It should fit securely.
Now, use a tape measure to measure 8cm down from the top of your water butt, and mark the spot. On this spot, drill a hole for the water butt connector, and simply attach this connector to the water butt by pushing it through the hole you have just drilled.
Finally, attach the water butt connector to the rainwater diverter using the fittings that come included with the water butt, and put the lid on top of the water butt, locking it into place.
Maintaining a water butt
Now that your water butt is up and running, it’s important to consider some regular maintenance to ensure it’s operating to the best of its ability, whilst keeping the water inside clean and fresh. Cleaning the exterior of the water butt is a good habit to get into to restrict any grime building up in the first place, which can simply be done by scrubbing it with a sponge, and some warm water on a regular basis.
Should the interior need cleaning, once your harvested water has been emptied into a watering can, you’ll need to invest in some good old fashioned elbow grease to remove any stubborn stains. Or, if you’re not up to that, give it a good blast with a garden or jet hose (quickly, incase there’s a hose ban!).
At EvenGreener, we make your water harvesting life even easier, stocking our Be Green Water Butt Freshener, which is a fabulous combination of natural, organic ingredients, designed to keep your water butt fresh and algae-free. It’s highly concentrated, so diluting a little bit with water will go a long way. Buy yours here.
We must also point out the importance of keeping your water butt free from any chemicals and soaps, as this will contaminate the water and leave it unhealthy for your plants and garden.
Conclusion
So, there’s our quick guide to installing and maintaining your water butt, and the importance of having one in the first place. With possible droughts forecasted for this year, and unfortunately a high likeliness of more to come in the future, it’s imperative we take daily steps in preserving our precious natural resources to keep building for a more sustainable future. A good first step you can take on is adopting an EvenGreener lifestyle, and harnessing the power of your green fingers to reap the rewards not just for your garden, but by spearheading habits and a style of living that puts the planet first.